Book a Free Strategy Call
Skip the read: talk to Walid in 30 min.
Free strategy call. We map your AI engineering team, you keep the notes.
Updated July 2026
Installing OpenAI Codex CLI takes one command. Getting real work out of it day to day is a different skill: knowing which sandbox mode to run in, when to let it edit without asking, how to hand it a task it can actually finish, and what to do when it gets stuck mid-change. This guide covers that part.
Quick start (4 steps):
npm install -g @openai/codex(orbrew install --cask codex)- Run
codex, choose "Sign in with ChatGPT" (or an API key) - Run
/initinside a repo to generate anAGENTS.md - Describe your first task in plain language
Everything below is the day-to-day part: permissions, sessions, config, and the errors people hit in week one. New to the tool itself? See what Codex CLI is for the conceptual overview before diving into setup.
Install and open your first session
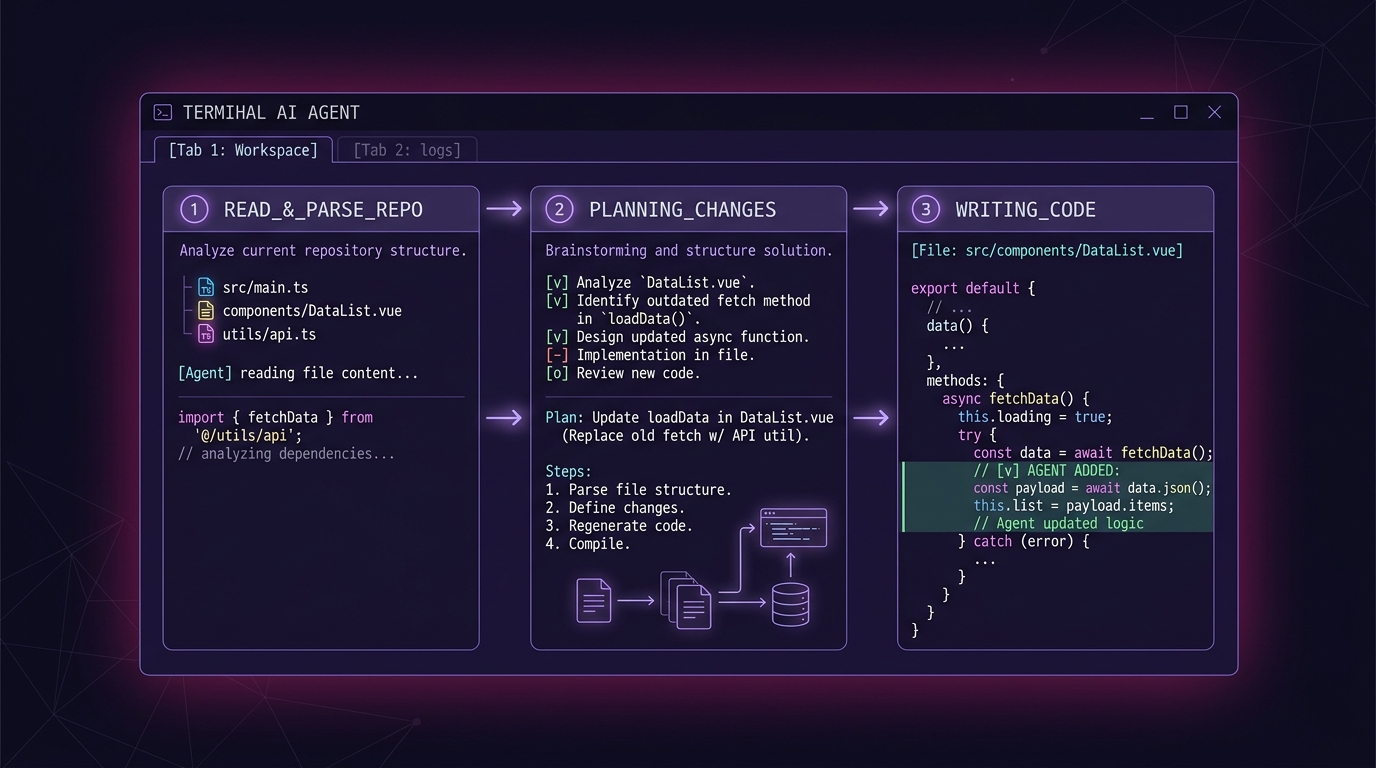
Three supported install paths, per OpenAI's own Codex CLI documentation:
# npm
npm install -g @openai/codex

# Homebrew (macOS)
brew install --cask codex

# Standalone installer (macOS/Linux)
curl -fsSL https://chatgpt.com/codex/install.sh | sh
Windows installs via a PowerShell script from the same source, or through WSL2 for the closest experience to macOS/Linux. Platform-specific binaries are also published on the openai/codex GitHub releases page if you don't want either a package manager or a curl-pipe-to-shell install.
From your project root, run:
codex
On first launch you'll be prompted to pick an auth method. That is the only decision required before you can start working.
Related Reads
Authenticate
Codex CLI supports two sign-in paths, and which one you pick changes how usage is billed.
Sign in with ChatGPT (the default OpenAI recommends). Run codex, select "Sign in with ChatGPT," and authenticate in the browser window that opens. This works with ChatGPT Plus, Pro, Business, Edu, and Enterprise plans, and Codex usage draws from the plan you already pay for rather than metered API billing.
API key. If you don't have a ChatGPT plan, or you want usage billed separately through the OpenAI Platform, authenticate with an API key instead. Every request is then billed per token at standard API rates rather than counted against a subscription.
Pick ChatGPT sign-in if you already pay for a ChatGPT plan and want Codex included. Pick the API key if you're wiring Codex into CI, a server, or any context where a browser-based login isn't practical.
Free weekly brief
Steal our production automations
The exact n8n flows, Claude Code setups, and prompts we ship for clients, broken down step by step. No spam, unsubscribe anytime.
Set your permission level before you touch real code
This is the step people skip and regret. Codex runs inside a sandbox with a configurable approval policy and sandbox mode, and the combination decides how much it can do without stopping to ask you first.
Inside a running session, type /permissions to see and change the current settings. The three sandbox modes, per OpenAI's sandboxing documentation:
| Sandbox mode | What Codex can do |
|---|---|
read-only | Inspect files only. Cannot edit or run commands without approval. |
workspace-write | Can read, edit files, and run commands inside the current workspace. Network access is off by default. This is the default for local work. |
danger-full-access | No filesystem or network restriction. Reserve this for cases where you genuinely want unrestricted access, not as a default. |
Approval policy controls when it pauses to ask, independent of the sandbox mode: untrusted (ask before most actions), on-request (ask only when Codex itself flags something as risky), or never (don't ask). OpenAI's own recommended low-risk default for local automation is workspace-write sandboxing paired with on-request approval, either set in config or passed as flags:
codex --sandbox workspace-write --ask-for-approval on-request
If you want Codex to reach the network from inside workspace-write mode (installing a package, hitting an API), you have to opt in explicitly in config, it is off by default.
Give it project context with AGENTS.md
Run /init inside a repo and Codex generates an AGENTS.md file, its equivalent of a persistent brief that loads at the start of every session. Without it, Codex re-derives your stack, conventions, and constraints from scratch on every task, which costs time and produces less consistent output.
Keep it short and specific in the first pass: the stack, where things live, the commands that must pass before a change is considered done, and anything it should never touch. Grow it as you catch it making the same mistake twice, the same discipline that applies to Claude Code's CLAUDE.md if you're running both tools.
Hand it a first task that it can actually finish
The official first-run guidance is to describe what you want in plain language rather than a rigid command syntax: explain the project, ask for a focused change, or describe a bug. Codex reads the repo, proposes edits, and (depending on your approval policy) runs commands to validate the change before handing control back.
Two habits make the first week smoother:
- Scope the first few tasks narrowly. A single bug fix or a small, well-defined feature gives Codex a tight loop to validate against. Save open-ended asks ("refactor this module") for once you trust its judgment on your codebase.
- Checkpoint with git before and after. Commit before you hand off a task and again once you've reviewed the result. That gives you a clean point to revert to if a change goes sideways, and it costs nothing since Codex already expects you're working inside version control.
Useful commands once you're past the first session
A handful of slash commands and CLI options cover most of what you'll reach for day to day, per OpenAI's CLI documentation:
/status-- shows your current session configuration, including auth method and usage./model-- switch the active model or reasoning effort mid-session./review-- has Codex analyze the current changes for issues before you commit them./permissions-- revisit sandbox mode and approval policy without restarting.codex resume-- reopen a recent session tied to the current repo, instead of starting a fresh one and losing context.
Common errors in week one
command not found: codex -- your install location isn't on PATH. If you used npm, check npm prefix -g and make sure that path's bin directory is in your shell's PATH; reopen the terminal after fixing it.
Auth prompt keeps reappearing -- usually a stale or expired ChatGPT session token. Run codex and choose to sign in again rather than trying to reuse a cached session.
Codex says it can't write a file or run a command -- check your sandbox mode with /permissions. read-only mode blocks edits by design; switch to workspace-write for the current session if you intend to let it make changes.
A task stalls or loses the plot on a big ask -- this is a scope problem, not a bug. Split the task into smaller steps, or give it a clearer AGENTS.md so it isn't guessing at your project's constraints on every turn.
Network calls fail inside workspace-write -- expected. That mode blocks network access unless you enable it explicitly in config. Either allow network for that workspace or run the specific step (an install, an API call) yourself outside the sandbox.
What this means for you
- Set your sandbox mode deliberately, don't accept whatever the default happens to be on a given machine.
workspace-writewithon-requestapproval is the sane starting point for local work; tighten toread-onlywhen you just want a second pair of eyes on a change. - Write an
AGENTS.mdbefore your first real task, not after your fifth correction. It is the single highest-leverage five minutes in the whole setup. - Checkpoint with git around every task. It costs nothing and it is the only reason a bad autonomous edit is a minor annoyance instead of a lost afternoon.
- Compare tools before you commit to one workflow. If you're weighing Codex against the CLI agent you already use, especially for editor-first workflows, see our honest Cursor vs Claude Code comparison.
If your team is standing up terminal coding agents across more than a couple of engineers, the setup questions compound: shared permission defaults, a consistent AGENTS.md/CLAUDE.md convention across repos, and CI wiring so an agent's checkpoint discipline doesn't depend on one person remembering to commit. AY Automate builds and ships agentic coding workflows for engineering teams as a regular part of our forward-deployed engineering work. Book a free consultation if you want a second pair of eyes on your setup before it's rolled out past one machine.
FAQ
Do I need a ChatGPT subscription to use Codex CLI?
No. You can authenticate with an API key instead and pay per token through the OpenAI Platform. A ChatGPT Plus, Pro, Business, Edu, or Enterprise plan lets Codex usage draw from that subscription instead of metered billing, which is the simpler path if you already pay for one.
What does /init actually do?
It generates an AGENTS.md file in your repo, the persistent project brief Codex reads at the start of every session. Without one, Codex has to re-derive your stack and conventions from scratch on each task.
What's the difference between sandbox mode and approval policy?
Sandbox mode (read-only, workspace-write, danger-full-access) sets what Codex is technically permitted to touch. Approval policy (untrusted, on-request, never) sets when it pauses to ask you first. They're independent settings, both changeable with /permissions.
Can I pick up where I left off in a previous session?
Yes, codex resume reopens a recent session tied to the current repository instead of starting from a blank context.
Does workspace-write mode allow internet access?
Not by default. Network access inside workspace-write is off unless you enable it explicitly in your Codex config for that workspace.
Is Codex CLI the same as using ChatGPT for code?
No. ChatGPT is a chat interface; Codex CLI is a terminal agent that reads your actual repo, edits files directly, and runs commands to validate its own changes, inside a sandbox you control.
Where do I set config permanently instead of passing flags every time?
In ~/.codex/config.toml for user-level defaults, or a .codex/config.toml inside a specific project for project-scoped overrides (only loaded once you've trusted that project).
Once Codex is part of your daily workflow, the next step is usually wiring it into CI/CD and team-wide standards, not just a local trial. See our Codex development agency if you want that built for your team.
Continue Reading
GPT-6 Astra vs Claude Fable 5.1 vs Opus 5.5: Why Model Routing Wins
GPT-6 Astra and Claude Fable 5.1 both list at $10 and $50 per million tokens. Claude Opus 5.5, GPT-6 Sol and GPT-6 Luna, all released September 22, cost far less. Verified prices, one independent index and a task-by-task routing table, prices checked September 26, 2026.
GPT-6 Sol and Luna: What OpenAI's Cheaper Model Tiers Mean for Automation
OpenAI released updated GPT-6 Sol and Luna on September 22, 2026 at half the API cost of their GPT-5.6 predecessors, positioned below GPT-6 Astra. Here is what the three-tier lineup means for routing automation tasks by cost and complexity.
How to Stop Hitting GPT-6 Astra Usage Limits
Practical tips from the RoboNuggets newsletter for stretching GPT-6 Astra usage, attributed to the author and checked against OpenAI pricing where possible.
Book a Free Strategy Call
Building this in production?
Walid runs a 30-min call to map your AI engineering team. Free, no slides.
Free weekly brief
Steal our production automations
The exact n8n flows, Claude Code setups, and prompts we ship for clients, broken down step by step. No spam, unsubscribe anytime.

Walid founded AY Automate to help businesses ship AI workflows that actually move revenue. He leads strategy and oversees every client engagement end-to-end.
Full Bio →