In short
- Give Claude Code one long prompt with five inputs: a reference film, a visual style by name, your brand files, your braindump and the proof you approve. Start from Walid's prompt below.
- Pin every version. Write
npx hyperframes@<version>with a version you checked, never@latest. - Keep four human gates: the script, one of three storyboards, three stills per scene, then the final film. No full render before you approve the stills.
- Build each scene as its own HyperFrames composition in parallel sub-agents, then assemble with video-use: cuts on word boundaries, 30ms audio fades, loudness at -14 LUFS.
- Make the agent check its own work: transcribe the final mix, review a frame every 7 seconds, fix what is broken, and show you the issue list.
Who it is for: Founders, marketers and content leads who want a motion graphics film for their company and are comfortable running Claude Code in a terminal. You need a reference film you like, brand files and a few numbers you are willing to show.
Overview
What you will have at the end
When AY Automate started working with its 60th client company, Walid did not hire an animator. He asked Claude Opus 5.5 to make a motion graphics video showing the growth, and posted what came back. The film was inspired by an a16z video. The whole thing came from one long prompt and a few tools that render video from code.
This playbook turns that prompt into a repeatable build. You will have a 90 to 120 second film, the HTML scenes it was made from, the script you approved and a record of the checks the agent ran on its own output. Because the scenes are code, changing a line of copy or a brand color means editing a file and rendering again.
Diagram
The whole system, with the human gates
Your inputs
reference film, style by name, brand files, braindump, approved proof
Fact-check the opening claim
real data, sources cited on screen
Write the script
you approve it
Three storyboard directions
you pick one
Build scenes in parallel
one HyperFrames composition per scene
Three stills per scene
you approve before any full render
Voice with word timestamps
every animation beat synced to the spoken word
Assemble with video-use rules
cuts, fades, loudness
Self-check pass
transcript, frame every 7 seconds, fixes
Final MP4
saved to your Downloads and opened
The agent does the work between gates. You decide at each gate.
Background
Who this is for and what you need
This fits a company that wants a short explainer or announcement film and has something true to say: a milestone, a product, a claim worth backing with data. It also fits a team that already uses Claude Code and wants to see what it does outside a code editor. It fits less well if you want live footage of people, since the rules below keep faces out unless you provide them.
Before you start
- Claude Code with a plan you already pay for. Check the Claude Code cost calculator if you want to estimate usage for a long session.
- Node.js 22 or newer and FFmpeg. HyperFrames needs both.
- HyperFrames. Open source under Apache 2.0, free to use from the CLI. The Studio app has a free plan, and Pro is $25 a month if you want its built-in video, image, voice and music models.
- video-use. Open source. It needs ffmpeg and an ElevenLabs API key, because ElevenLabs Scribe gives the word-level timestamps.
- A voice model. ElevenLabs, MiniMax or similar. Check current pricing on their sites.
- A music model. Lyria or ElevenLabs Music. Check current pricing.
- A transcription service. ElevenLabs Scribe or Deepgram, for the self-check and word timing. Check current pricing.
- A reference film you like, as a URL the agent can download.
- Brand files: logo, colors and fonts.
- An approved proof list: the clients, numbers and quotes you are happy to show, and nothing else.
Step 1
Install the tools and pin the versions
HyperFrames turns HTML, CSS, JavaScript and media into deterministic MP4 videos. Deterministic matters here: the same composition renders the same film, so a fix on scene four does not quietly change scene two. You can use it from the CLI, from coding agents such as Claude Code, Codex and Cursor through skills, or as a rendering core. No React is required.
The skills are what make the agent good at it. They teach the production loop: plan the video, write valid HTML, wire seekable animations, add media, lint, preview and render. HyperFrames ships 9 skills. The main one, /hyperframes, carries the contract and the references for film, captions, overlays, motion and look.
Config
Setup commands
# 1. Prerequisites: Node.js 22+ and FFmpeg must already be installed
node --version
ffmpeg -version

# 2. HyperFrames skills for your coding agent (pick "Core Skills")
npx skills add heygen-com/hyperframes

# Or, for Claude Code, install the plugin
claude plugin marketplace add heygen-com/hyperframes
claude plugin install hyperframes@hyperframes

# Keep the skills in step with the CLI version you pinned
npx hyperframes skills update

# 3. CLI by hand. Pin the version you checked. Never @latest.
npx hyperframes@<pinned version> init my-film
npx hyperframes@<pinned version> preview
npx hyperframes@<pinned version> render

# 4. video-use: follow the install steps in its README
#    https://github.com/browser-use/video-use
#    It needs ffmpeg and an ElevenLabs API key (Scribe transcription).
#    Put the key in your environment, never in a prompt or a committed file.
Replace <pinned version> with a real version you checked. Install video-use from its README, not from a copy of these commands.
Two more things to know about video-use. It lets the model work with video without watching it. The first layer is a packed transcript of about 12KB (takes_packed.md). The second is a filmstrip and waveform image, pulled only at decision points. Its pipeline runs Transcribe, Pack, LLM reasons, EDL, Render, Self-eval, and it keeps session memory in project.md.
Step 2
Write the inputs brief
The prompt is only as good as what you feed it. Walid gives the agent five inputs and nothing vague. Fill them in before you paste anything into Claude Code.
- Input 1
Reference film
A film to match in structure and pacing. The agent downloads it and analyzes the shot list, pacing and sound design before it writes a word.
- Input 2
Visual style, by name
Name a style and list its traits. Walid's example is 3Blue1Brown: black background, thin white lines, serif type, blue, yellow and green accents, shapes that transform, one idea on screen at a time.
- Input 3
Brand
Logo file, colors and fonts. Give files and hex values, not descriptions.
- Input 4
What we do, in your words
A braindump. Messy is fine. Your phrasing is what keeps the script from sounding like every other company film.
- Input 5
Proof you can show
Clients, numbers you approve and quotes. This is a closed list. Anything not on it stays off screen.
Naming a style is the strongest single instruction you can give. On 2026-09-21 Walid asked Claude Code to explain what Jev is in a simple way for LinkedIn. He wrote one prompt and said: use 3Blue1Brown style. That one phrase carried the background, the line weight, the type and the pacing. The post got 50 reactions, 9 comments and 2 reposts.
Template
Inputs brief
FILM BRIEF FOR [COMPANY]

Length: 90 to 120 seconds
Reference film: [URL to the film whose structure and pacing we want to match]
Visual style, by name: [e.g. 3Blue1Brown, and the traits you want: background, line weight, type, accent colors, how shapes move]

Brand files
- Logo: [path to the file]
- Colors: [hex values]
- Fonts: [font names and where the files are]

What we do, in my words (braindump, messy is fine):
[paste it here]

Proof you may show (approved list, nothing else goes on screen)
- Clients: [names I approve]
- Numbers: [each number, with where it comes from]
- Quotes: [quote, who said it, written permission yes/no]

Opening claim to fact-check: [the one claim the film opens on]

Tools I have keys for: [voice model, music model, transcription service]
Where to save the result: [folder]
Save this as a file in the project folder. The agent reads it first, and you can reuse it for the next film.
Step 3
Run the prompt, and read the script before anything else
This is the prompt Walid started with, word for word. Copy it, swap in your company and let it cook. Everything in square brackets is yours to fill from the brief in step 2.
Prompt
Walid's brand film prompt
You are directing a 90-120s brand film for [COMPANY], rendered from code. No video editor.
Setup (install only what's missing, and pin versions):
- video-use (github.com/browser-use/video-use) for cuts, audio mix, and word-level timing
- HyperFrames (npx hyperframes@<pinned version>) for every animated scene
- A TTS voice (ElevenLabs, MiniMax or similar), a music model (Lyria or ElevenLabs Music), and Deepgram or Scribe for transcripts
Inputs I'm giving you:
- Reference film to match in structure and pacing: [URL]. Download it, analyze the shot list, pacing, and sound design before writing anything.
- Visual style to match by name: [e.g. 3Blue1Brown: black background, thin white lines, serif type, blue/yellow/green accents, shapes that transform, one idea on screen at a time]
- Brand: [logo file, colors, fonts]
- What we do, in my words: [braindump]
- Proof I can show: [clients, numbers I approve, quotes]
Process (do not skip steps):
1. Research the claim the film opens on and fact-check it against real data. Cite sources on screen.
2. Write the script. Show it to me. Wait for approval.
3. Propose 3 storyboard directions. I pick one.
4. Build each scene as its own HyperFrames composition, in parallel sub-agents. Deliver 3 still frames per scene. No full render until I approve the stills.
5. Generate the voice with word timestamps and sync every animation beat to the spoken word.
6. Assemble with video-use rules: cut on word boundaries, 30ms audio fades, loudness at -14 LUFS.
7. Self-check before showing me: transcribe the final mix and confirm every line is audible, extract a frame every 7s and review it, and fix what's broken.
8. Save the result to my Downloads and open it.
Hard rules: no fake screenshots, no faces unless I provide them, no revenue numbers unless I approve them, and no claim on screen without a source.
Pin a real version in place of <pinned version> before you paste it.
Read the structure, because it explains why it works. The prompt tells the agent what to install and how, what you are giving it, and then a numbered process with an instruction not to skip steps. Two of those steps end in the words approval or pick, which tells the agent to stop. The last line sets hard rules. We cover each part in the steps below.
The agent opens with research. It checks the claim the film starts on against real data and plans to cite sources on screen. Then it writes the script and waits. This is the first gate, and it is the cheapest place to fix the film. A wrong sentence here costs you a minute. The same sentence after rendering costs a rebuilt scene.
Step 4
Approve the script, pick a storyboard and approve stills
The prompt builds in three stops before the final film, and you add a fourth when the film comes back. Each gate has one job. Tell your reviewers what to look at, so they do not give notes on things that are not ready yet.
| Gate | What the agent shows | What you check | What to say if it fails |
|---|---|---|---|
| 1. Script | Full script with the sources for each claim | Every line sounds like you. Every claim has a source. Nothing on the screen is outside your proof list. Length fits 90 to 120 seconds when read aloud. | Cut or rewrite named lines. Ask for the source of any claim you do not recognize. |
| 2. Storyboard | Three directions, each with the shot sequence and the look | Which direction matches the reference film's structure and pacing, and your named style. | Pick one. Ask for changes inside that direction, not a fourth direction. |
| 3. Stills | Three still frames per scene, with a note on what each shows | Brand colors and fonts are right. Text is readable. One idea per scene. No fake screenshots, no faces you did not provide. | Name the scene and the frame. The agent revises that composition only. |
| 4. Final film | The assembled MP4 plus the self-check issue list | Every line audible. Pacing matches the reference. The opening claim and sources read cleanly. The issue list is empty. | Give timestamps. The agent fixes, re-assembles and runs the self-check again. |
1. Script
- What the agent shows
- Full script with the sources for each claim
- What you check
- Every line sounds like you. Every claim has a source. Nothing on the screen is outside your proof list. Length fits 90 to 120 seconds when read aloud.
- What to say if it fails
- Cut or rewrite named lines. Ask for the source of any claim you do not recognize.
2. Storyboard
- What the agent shows
- Three directions, each with the shot sequence and the look
- What you check
- Which direction matches the reference film's structure and pacing, and your named style.
- What to say if it fails
- Pick one. Ask for changes inside that direction, not a fourth direction.
3. Stills
- What the agent shows
- Three still frames per scene, with a note on what each shows
- What you check
- Brand colors and fonts are right. Text is readable. One idea per scene. No fake screenshots, no faces you did not provide.
- What to say if it fails
- Name the scene and the frame. The agent revises that composition only.
4. Final film
- What the agent shows
- The assembled MP4 plus the self-check issue list
- What you check
- Every line audible. Pacing matches the reference. The opening claim and sources read cleanly. The issue list is empty.
- What to say if it fails
- Give timestamps. The agent fixes, re-assembles and runs the self-check again.
The rule that saves the most time is the one in step 4 of the prompt: no full render until you approve the stills. Stills are cheap to produce and cheap to judge. A full render is neither. Three frames per scene (start, middle and end works well) show the layout, the type and how the idea moves, without a wait.
Pick a storyboard direction fast. The point of seeing three is that you react better to options than to a blank page. If none is right, say what the closest one gets wrong and ask the agent to revise that one.
Step 5
Build each scene as its own composition, in parallel
Once you pick a storyboard, the agent builds each scene as its own HyperFrames composition, in parallel sub-agents. One scene per composition keeps a fix local. If scene five has a typo, you rebuild scene five.
Claude Code makes the sub-agent briefs for you, but you should know what a good one contains. It names the scene and its script lines, sets the one idea on screen, repeats the style rules and the brand files, lists the proof allowed in that scene, and sets a stop line. The brief below is a template for that.
Prompt
Per-scene sub-agent brief
You build ONE scene of a brand film as ONE HyperFrames composition.

Scene number and name: {{scene_id}}, {{scene_name}}
What this scene says (script lines, with the time window): {{script_lines}}
The single idea on screen: {{one_idea}}
Visual style, by name: {{style_name}} and its rules: {{style_rules}}
Brand: {{logo_path}}, {{colors}}, {{fonts}}
Allowed proof for this scene: {{approved_proof}}

Rules:
- Use the HyperFrames skills. Write valid HTML, CSS and JavaScript with seekable animations only.
- One idea on screen at a time. Match the pacing of the reference film.
- Leave timing hooks for the voice: every animation beat has a named start time that I can move to a word timestamp later.
- Any figure, number or claim on screen needs a source line from the approved proof list. If it is not on the list, leave it out.
- No fake screenshots. No faces. No revenue numbers.
- Lint and preview the composition.
- Deliver exactly 3 still frames of this scene (start, middle, end) and a one-line note on what each shows.
- Do NOT run a full render. Stop after the stills.

Work only inside {{scene_folder}}. Do not edit other scenes.
Give each sub-agent its own folder. Two agents editing the same files is how scenes overwrite each other.
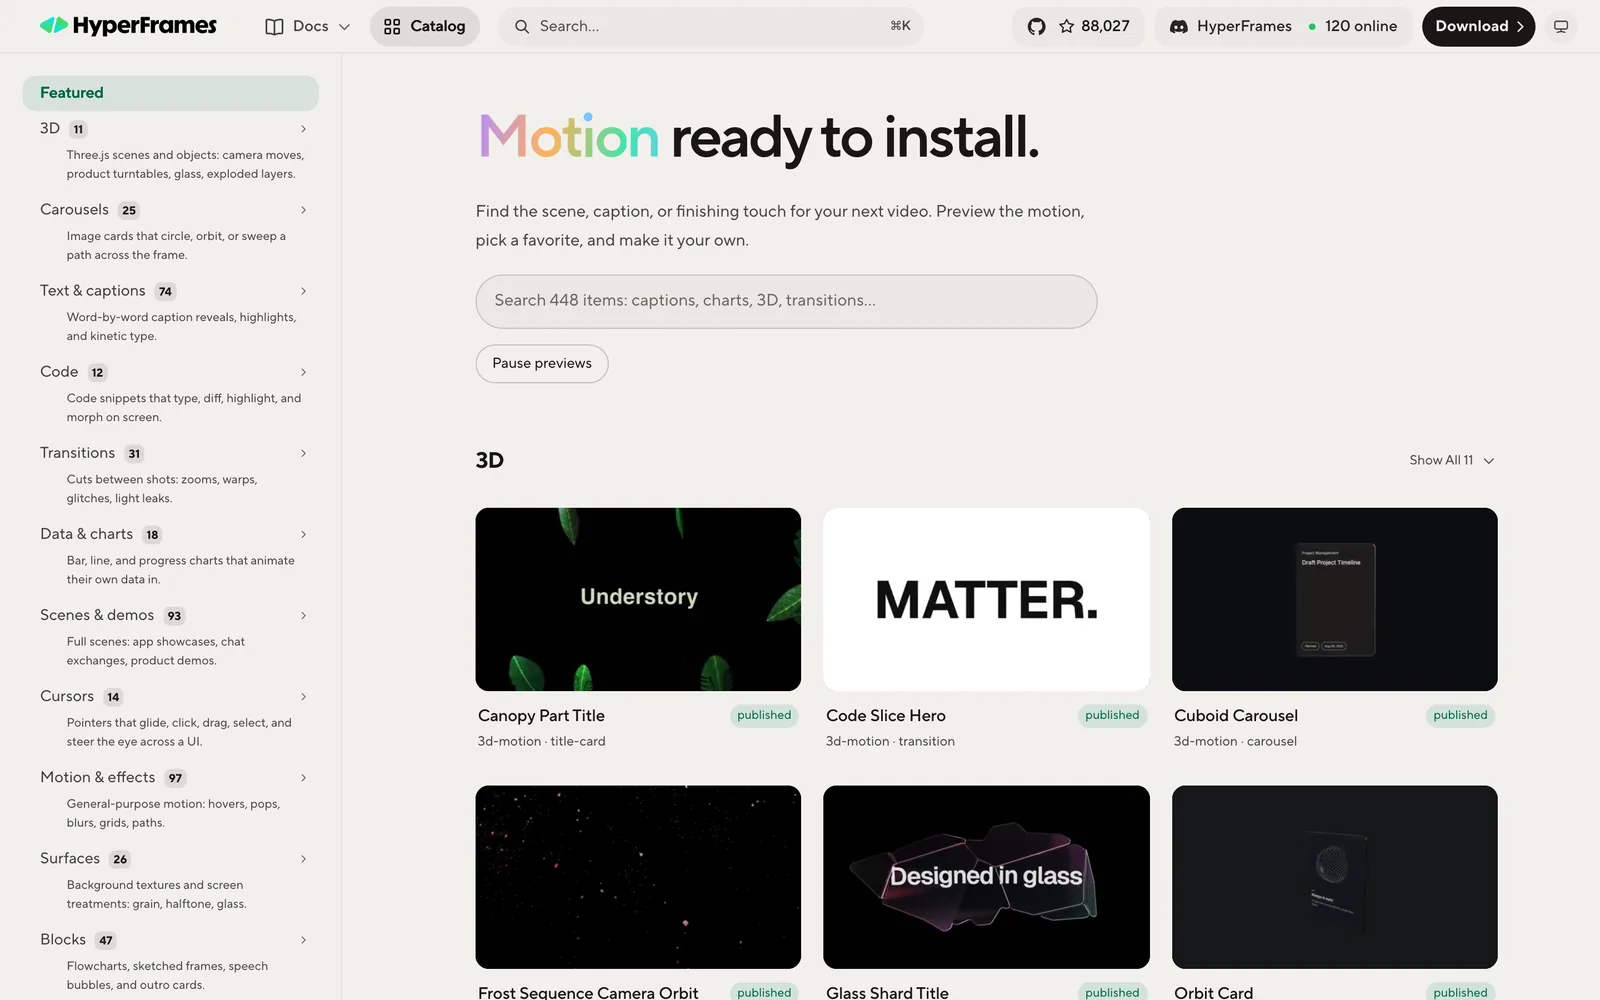
You do not have to start from nothing. The HyperFrames catalog lists scenes, captions, charts and transitions your agent can install and adapt. On 2026-11-22 the catalog page listed 448 items, with categories for 3D, carousels, text and captions, code, transitions, data and charts, and scenes and demos. A chart scene is a good example: install a chart from the catalog, then restyle it in your named style with your approved numbers.
Step 6
Generate the voice, sync the animation and assemble
After you approve the stills, the agent generates the voice with word timestamps and syncs every animation beat to the spoken word. This is why the scene brief asks for named start times on each beat: the agent moves them to the timestamps once the voice exists. A line of text that lands on the word it describes feels intentional. The same text a half second early reads as a mistake.
Then the agent assembles the film with video-use rules. Video-use cuts filler words and dead space, applies 30ms audio fades at every cut, and can generate animation overlays through HyperFrames, Remotion, Manim or PIL in parallel sub-agents. It also self-evaluates the rendered output at every cut boundary. You set the spec once in the prompt.
| Setting | Value | Why it matters |
|---|---|---|
| Cut points | On word boundaries | A cut inside a word is audible as a click or a clipped syllable. |
| Audio fades | 30ms at every cut | A short fade removes the pop at each join without softening the voice. |
| Loudness | -14 LUFS | A fixed loudness target keeps the film from sounding too quiet or too loud when it plays next to other content. |
| Timing source | Word-level timestamps from the transcript | Animation beats and cuts follow the spoken word, not a guess. |
| Review frames | One frame every 7 seconds | A regular sample catches layout and brand problems across the whole film. |
Cut points
- Value
- On word boundaries
- Why it matters
- A cut inside a word is audible as a click or a clipped syllable.
Audio fades
- Value
- 30ms at every cut
- Why it matters
- A short fade removes the pop at each join without softening the voice.
Loudness
- Value
- -14 LUFS
- Why it matters
- A fixed loudness target keeps the film from sounding too quiet or too loud when it plays next to other content.
Timing source
- Value
- Word-level timestamps from the transcript
- Why it matters
- Animation beats and cuts follow the spoken word, not a guess.
Review frames
- Value
- One frame every 7 seconds
- Why it matters
- A regular sample catches layout and brand problems across the whole film.
Subtitles are an option. video-use burns subtitles in 2-word uppercase chunks by default. If your named style has its own caption look, say so in the brief. HyperFrames has caption scenes in its catalog and a captions reference in /hyperframes.
Step 7
Hold the hard rules and run the self-check
The last line of Walid's prompt is a set of hard rules. Treat them as fixed. A brand film makes claims in your name, and an agent will fill gaps with plausible material if you let it.
| Rule | Why it exists |
|---|---|
| No fake screenshots | A mocked dashboard on screen reads as a real product or real results. If you have no real screenshot, draw the idea as a diagram in your named style. |
| No faces unless you provide them | The agent has no right to invent a person who looks like your team or your customer. Faces come from files you supply, with permission. |
| No revenue numbers unless you approve them | Revenue is the number most likely to be repeated, quoted and checked. Only figures on your approved proof list go on screen. |
| No claim on screen without a source | The film opens on a claim you fact-checked. Every other claim needs the same treatment, with the source visible. |
No fake screenshots
- Why it exists
- A mocked dashboard on screen reads as a real product or real results. If you have no real screenshot, draw the idea as a diagram in your named style.
No faces unless you provide them
- Why it exists
- The agent has no right to invent a person who looks like your team or your customer. Faces come from files you supply, with permission.
No revenue numbers unless you approve them
- Why it exists
- Revenue is the number most likely to be repeated, quoted and checked. Only figures on your approved proof list go on screen.
No claim on screen without a source
- Why it exists
- The film opens on a claim you fact-checked. Every other claim needs the same treatment, with the source visible.
Then comes step 7 of the prompt, the self-check. The agent must check its own work before it shows you anything. It transcribes the final mix and confirms every line is audible, extracts a frame every 7 seconds and reviews each one, then fixes what is broken. This works because the agent has tools to look and listen: video-use's transcript and filmstrip layers, plus your transcription service.
Prompt
Self-check pass
The film is assembled at {{final_path}}. Check it before you show it to me.

1. Transcribe the final mix. Compare it with the approved script line by line. List every line that is missing, cut off or hard to hear.
2. Extract one frame every 7 seconds. Review each frame. List anything wrong: overlapping text, text outside the safe area, wrong colors or fonts, a logo in the wrong state, a claim without a source line, a face or screenshot I did not provide.
3. Check the audio spec: cuts on word boundaries, 30ms fades at each cut, loudness at -14 LUFS. Report the measured loudness.
4. Write the issue list with timestamps.
5. Fix every issue, re-assemble, and run this check again.
6. Only when the list is empty, save the film to {{downloads_folder}} and open it. Show me the final issue list, even if it is empty.
Ask for the issue list every time, even when it is empty. An empty list you can see is better than a claim that everything is fine.
The last step of the prompt saves the result to your Downloads and opens it. Watch the film once with the sound on and once with the sound off. If the second view still makes sense, the visuals carry the idea on their own.
Watch out
Failure modes we see most
Unpinned tools change under you
A render that worked yesterday breaks today because
@latestmoved. Fix: pin HyperFrames to a checked version, keep the version in the prompt and the project notes, and update the skills withnpx hyperframes skills updateto match.A claim with no source
The agent states a statistic it half remembers. Fix: fact-check the opening claim first, require a source line on screen for every claim, and cut any claim the agent cannot source.
Numbers you did not approve
A revenue figure or client count appears in a scene. Fix: an approved proof list in the brief, and a stills review where you read every number.
Full render too early
You wait on a render and then find the colors wrong. Fix: three stills per scene and no full render until you approve them.
Voice and animation drift apart
Text lands before or after the word it describes. Fix: ask for word timestamps and named beat times, and sync every beat to them before assembly.
Lines you cannot hear
Music or effects cover part of the voice. Fix: the self-check transcription. If a line in the script is missing from the transcript of the final mix, it was not audible. Re-mix and run the check again.
Time and money
Time and cost
Plan about three days: one for the script, one for the scenes and one for assembly and review. Scope decides the real number. A film with few scenes and a reference you already know goes faster. A film with several charts and a long fact-check goes slower.
Timeline
A planning estimate for the first film
Script day, day 1. Inputs brief, fact-check of the opening claim, script and approval, three storyboards and your pick.
Scenes day, day 2. Parallel scene builds, three stills per scene, your approvals and fixes.
Assembly and review day, day 3. Voice with timestamps, sync, assembly, self-check pass, your final review.
- Script dayDay 1
Inputs brief, fact-check of the opening claim, script and approval, three storyboards and your pick.
- Scenes dayDay 2
Parallel scene builds, three stills per scene, your approvals and fixes.
- Assembly and review dayDay 3
Voice with timestamps, sync, assembly, self-check pass, your final review.
A planning estimate, not a promise. Scope decides the real number.
| Cost | What it is | Keep it down by |
|---|---|---|
| HyperFrames | Open source under Apache 2.0, free. Studio Pro is optional at $25 a month and adds video, image, voice and music models and 25,000 credits a month. | Use the free CLI and bring your own voice and music keys, unless you want everything in one app. |
| Voice and music models | ElevenLabs, MiniMax, Lyria or ElevenLabs Music. Check current pricing on their sites. | Generate the voice once from the approved script. Do not regenerate it for a scene fix. |
| Transcription | ElevenLabs Scribe or Deepgram. video-use uses Scribe for word-level timestamps. Check current pricing. | Transcribe the final mix once per self-check pass. |
| Claude Code plan | Your existing plan. Sub-agents building scenes in parallel use more tokens than one agent. | Approve the script and storyboard before the scene builds start. Use the Claude Code cost calculator to estimate. |
| Render compute | Local render on your machine, or hyperframes cloud render, or your own AWS Lambda. | Render stills and previews while you iterate. Run the full render only after you approve the stills. |
HyperFrames
- What it is
- Open source under Apache 2.0, free. Studio Pro is optional at $25 a month and adds video, image, voice and music models and 25,000 credits a month.
- Keep it down by
- Use the free CLI and bring your own voice and music keys, unless you want everything in one app.
Voice and music models
- What it is
- ElevenLabs, MiniMax, Lyria or ElevenLabs Music. Check current pricing on their sites.
- Keep it down by
- Generate the voice once from the approved script. Do not regenerate it for a scene fix.
Transcription
- What it is
- ElevenLabs Scribe or Deepgram. video-use uses Scribe for word-level timestamps. Check current pricing.
- Keep it down by
- Transcribe the final mix once per self-check pass.
Claude Code plan
- What it is
- Your existing plan. Sub-agents building scenes in parallel use more tokens than one agent.
- Keep it down by
- Approve the script and storyboard before the scene builds start. Use the Claude Code cost calculator to estimate.
Render compute
- What it is
- Local render on your machine, or
hyperframes cloud render, or your own AWS Lambda. - Keep it down by
- Render stills and previews while you iterate. Run the full render only after you approve the stills.
The biggest saving is process, not price. Each gate you hold keeps an expensive mistake from reaching a render. The agent can rebuild a scene in minutes. A review round that finds a wrong claim after the final render costs the whole assembly.
Results
How to measure it
| Metric | Where it comes from | Which way you want it |
|---|---|---|
| Approval rounds needed | Count of rework requests at each of the four gates | Down with each film |
| Time from braindump to final | Timestamp of the brief vs. the saved MP4 | Down |
| Share of scenes approved at stills first time | Scene log: approved at first stills vs. revised | Up |
| Post engagement vs. your average | Reactions, comments and reposts on the post, against your usual posts | Up |
| Sourced claims on screen | Count of claims with a source line, over all claims | All of them |
| Issues found in the self-check | Issue list from the first self-check pass | Down as your prompt and brief improve |
Approval rounds needed
- Where it comes from
- Count of rework requests at each of the four gates
- Which way you want it
- Down with each film
Time from braindump to final
- Where it comes from
- Timestamp of the brief vs. the saved MP4
- Which way you want it
- Down
Share of scenes approved at stills first time
- Where it comes from
- Scene log: approved at first stills vs. revised
- Which way you want it
- Up
Post engagement vs. your average
- Where it comes from
- Reactions, comments and reposts on the post, against your usual posts
- Which way you want it
- Up
Sourced claims on screen
- Where it comes from
- Count of claims with a source line, over all claims
- Which way you want it
- All of them
Issues found in the self-check
- Where it comes from
- Issue list from the first self-check pass
- Which way you want it
- Down as your prompt and brief improve
Take a baseline before you publish: your average reactions, comments and reposts on recent posts, and the time your last video took by whatever method you used. Re-measure at the first and second film. The approval-round and first-time stills numbers should improve as your brief and your named style get tighter. Walid's reference points are two posts: the brand film post with 34 reactions, 11 comments and 5 reposts, and the 3Blue1Brown explainer post with 50 reactions, 9 comments and 2 reposts, both as of 2026-11-22. Use your own numbers as the bar.
Questions
FAQ
What is HyperFrames?
HyperFrames is HeyGen's open-source AI video editor and framework, released under Apache 2.0. It turns HTML, CSS, JavaScript, media and seekable animations into deterministic MP4 videos. You can use it from the CLI, from coding agents such as Claude Code, Codex and Cursor with skills, or as a rendering core.
Can Claude Code make a video?
Yes, with the right tools. Claude Code writes the scenes as HyperFrames compositions, and video-use handles cuts, audio fades and word-level timing. You approve the script, a storyboard and still frames before any full render, and the agent checks the final mix itself.
How do I install HyperFrames for Claude Code?
Run npx skills add heygen-com/hyperframes and pick Core Skills, or add the plugin with claude plugin marketplace add heygen-com/hyperframes and claude plugin install hyperframes@hyperframes. You need Node.js 22 or newer and FFmpeg. Pin the CLI version instead of using @latest.
How do I make AI motion graphics that match my brand?
Give the agent your logo, colors and fonts as files, and name a visual style in one phrase, such as 3Blue1Brown with its traits. Add a reference film to match in structure and pacing. Review three still frames per scene before any full render.
How long does an AI explainer video take with this workflow?
Plan about three days: a script day, a scenes day and an assembly and review day. Scope decides the real number, and each approval gate you hold keeps expensive mistakes out of the final render.